- Installation
- Configuring the Site Controller
- Commissioning New Installs
- Adding Zones and Scenes
- Adding Devices with Census
- Adding Lights and Sensors
- Setting Up Daylight Harvesting
- Setting Up Demand Response
- Setting Up Dynamic Behaviors
- Controlling Lights with Events
- Administration
- Release Notes
- Resources
- FAQ
Establishing a Connection to the Site Controller
The SimplySNAP Site Controller comes preconfigured with the SimplySNAP software so there is no user installation of software required. The current version of the SimplySNAP software supports the Google Chrome browser. If you don’t have the Google Chrome browser installed on your device, please download and install it from http://www.google.com/chrome
Accessing the Site Controller
The SimplySNAP Site Controller supports connections via Ethernet, Wi-Fi, and, optionally, cellular. The SimplySNAP Site Controller serves as the access point and broadcasts a Wi-Fi SSID over the air. During installation the Wi-Fi connection is used to establish communications between the controller and a browser based device such as a computer or tablet. After that, it can be accessed via Ethernet, Wi-Fi, or cellular. SimplySNAP 4.0 introduced stronger out-of-the-box security measures, and a change in default user names and passwords. Depending on your site controller version, there are two ways to wirelessly connect.
Each site controller broadcasts a Wi-Fi SSID that will be visible from the network
connections panel of your computer or tablet.
It will appear in your device's network connections list as SimplySNAP_XXXXXX
where XXXXXX is the specific address of the site controller.
This address is unique to each site controller and matches the last 6 alphanumeric
characters of the Ethernet MAC address.
The site controller has randomized passwords for Wi-Fi and the default user,
and both are available on a sticker on the side of the site controller.
The SSID will be visible from the network connections panel of your computer or tablet,
and can be selected like any wireless network.
When you select the SSID and your computer attempts to connect to the site controller, it will prompt you for a password to complete the connection.
Enter the default Wi-Fi password provided on the site controller sticker
to establish the connection. (For site controllers running a SimplySNAP version prior to 4.0 use synapse!wireless)
When this password is entered a connection is established and will appear in your network settings. This may also appear as an “Unidentified network” with no internet access on some devices.
Logging In
Launch the Chrome browser and enter https://192.168.55.1 in the address bar.
Make sure it is entered exactly as shown. (This is a secure connection to a specific IP address that is the factory default within the site controller). This connection mimics a connection to an internet access point.
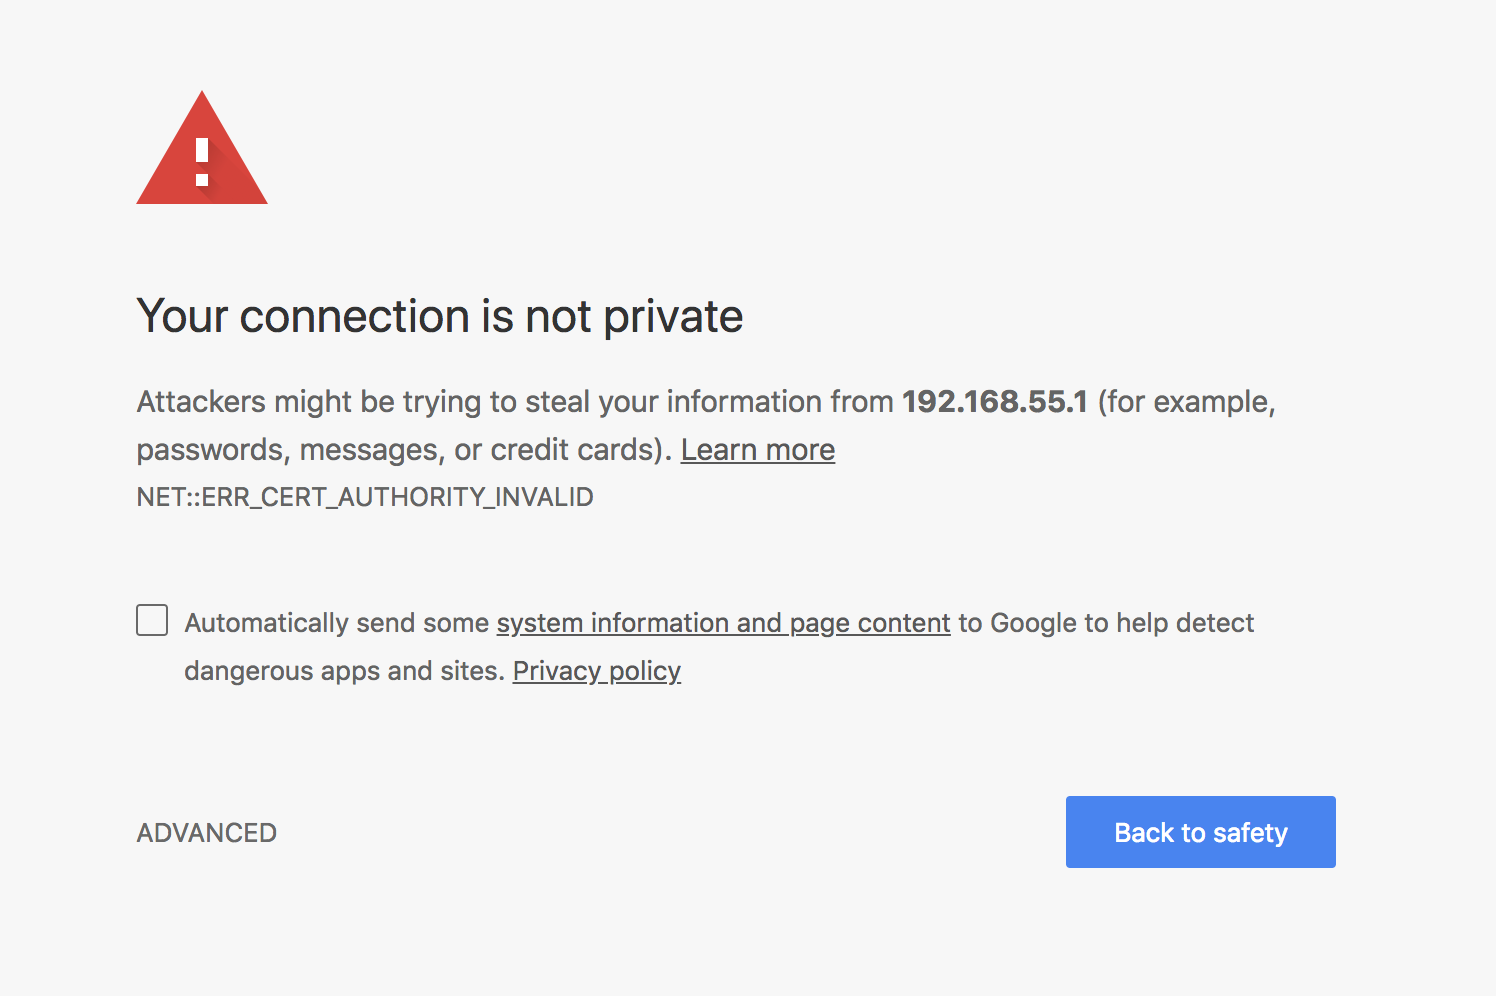
You will receive a warning as shown below. Click the Advanced link at the bottom, then click the "Proceed to 192.168.55.1 (unsafe)" link. (This warning is displayed because the site controller is using an unsigned security certificate.)
The SimplySNAP login page should now appear in your browser and present you with the login screen for the SimplySNAP site controller.
Username: snap
qwertyui.After your first login, if you are prompted to change your password from the default, follow the on-screen instructions.
Using Wired Ethernet
The SimplySNAP Site Controller may also be connected to a wired LAN network and accessed via the LAN. The LAN must be configured with a DHCP server to provide an IP address to the site controller when it is connected. To use this method of connection, you must identify the IP address the DHCP server provided to the site controller.
To identify a DHCP assigned IP address:
Connect to the site controller via Wi-Fi as described above and log in.
Click the Config menu item in the navigation menu, then click the System tab.
The site controller IP address is shown in the field labeled Ethernet IP Address. This address may be entered into a web browser's address bar and used to connect to the site controller across a wired LAN.
To use a static IP address for site controller connectivity:
Access the Ethernet Settings screen by clicking Config - Ethernet Settings.
Under the Ethernet heading, click Static.
Enter the Static IP addressing for your network in the provided fields.
Click the Save Changes button to use static IP addressing, or Cancel to exit without changing settings.
Changing Wi-Fi Settings
A SimplySNAP site controller is assigned an SSID at the factory, but this is confusing in installations that have multiple site controllers. For safety and ease of use, Synapse Wireless recommends that you change the SSID and Key for your site controller as soon as is reasonable.
To change the SSID and Key for the built-in Access Point:
Access the Wi-Fi Settings tab by clicking Config, Wi-Fi Config.
Select Access Point
Enter your desired SSID and Key in the fields provided.
Click Save Changes to save your new Wi-Fi settings, or Cancel to exit without saving.
If you don't plan to use Wi-Fi access within your SimplySNAP system, you can also disable Wi-Fi access.
To disable Wi-Fi access:
Access the Wi-Fi Settings tab by clicking Config, Wi-Fi Config.
Select Disabled.
Click Save Changes to save your new Wi-Fi settings, or Cancel to exit without saving.
A SimplySNAP site controller can also connect to an available 2.4 GHz Wi-Fi network as a client. Note that in this mode, the site controller will not be an access point.
To connect to a Wi-Fi network as a client:
Access the Wi-Fi Settings tab by clicking Config, Wi-Fi Config.
Select Client (DHCP) (or Client (Static) if you need to provide a static IPv4 address).
Select or enter your desired SSID and Key in the fields provided.
If using Client (Static) mode, enter the IPv4 settings in the fields provided.
Click Save Changes to save your new Wi-Fi settings, or Cancel to exit without saving.
Installing a Signed Security Certificate
SimplySNAP is accessed through a secure web browser session, which means the browser expects to receive a digital certificate that ensures the connection is with the correct service. If this certificate is not present, the browser will issue a warning that your session with the SimplySNAP site controller is not private, and attackers might be attempting to steal your information.
Generating and assigning a trusted certificate will remove this message and help ensure your connection is what you expect it to be. These certificates are issued by certificate authorities such as Comodo and Symantec, and are typically issued for internet facing applications. If your SimplySNAP installation is behind your firewall, the certificate is not necessary except to remove the browser warning. If you obtain a certificate from a certificate authority, you can upload it to the SimplySNAP site controller via the HTTPS tab.
To assign a trusted certificate to your SimplySNAP installation:
Access the HTTPS screen by clicking Config - HTTPS.
Click the Cert file button and browse to and select the cert file you received from the certificate authority, then click the Open button.
Click the Key file button and browse to and select the key file you received from the certificate authority,then click the Open button.
Click the Submit button to complete the submission.